
How I Post Process My Fuji RAW Files In Lightroom. Black and White

This is a follow on from last week's post on editing colour shots, so if you haven't seen that before then do check it out.
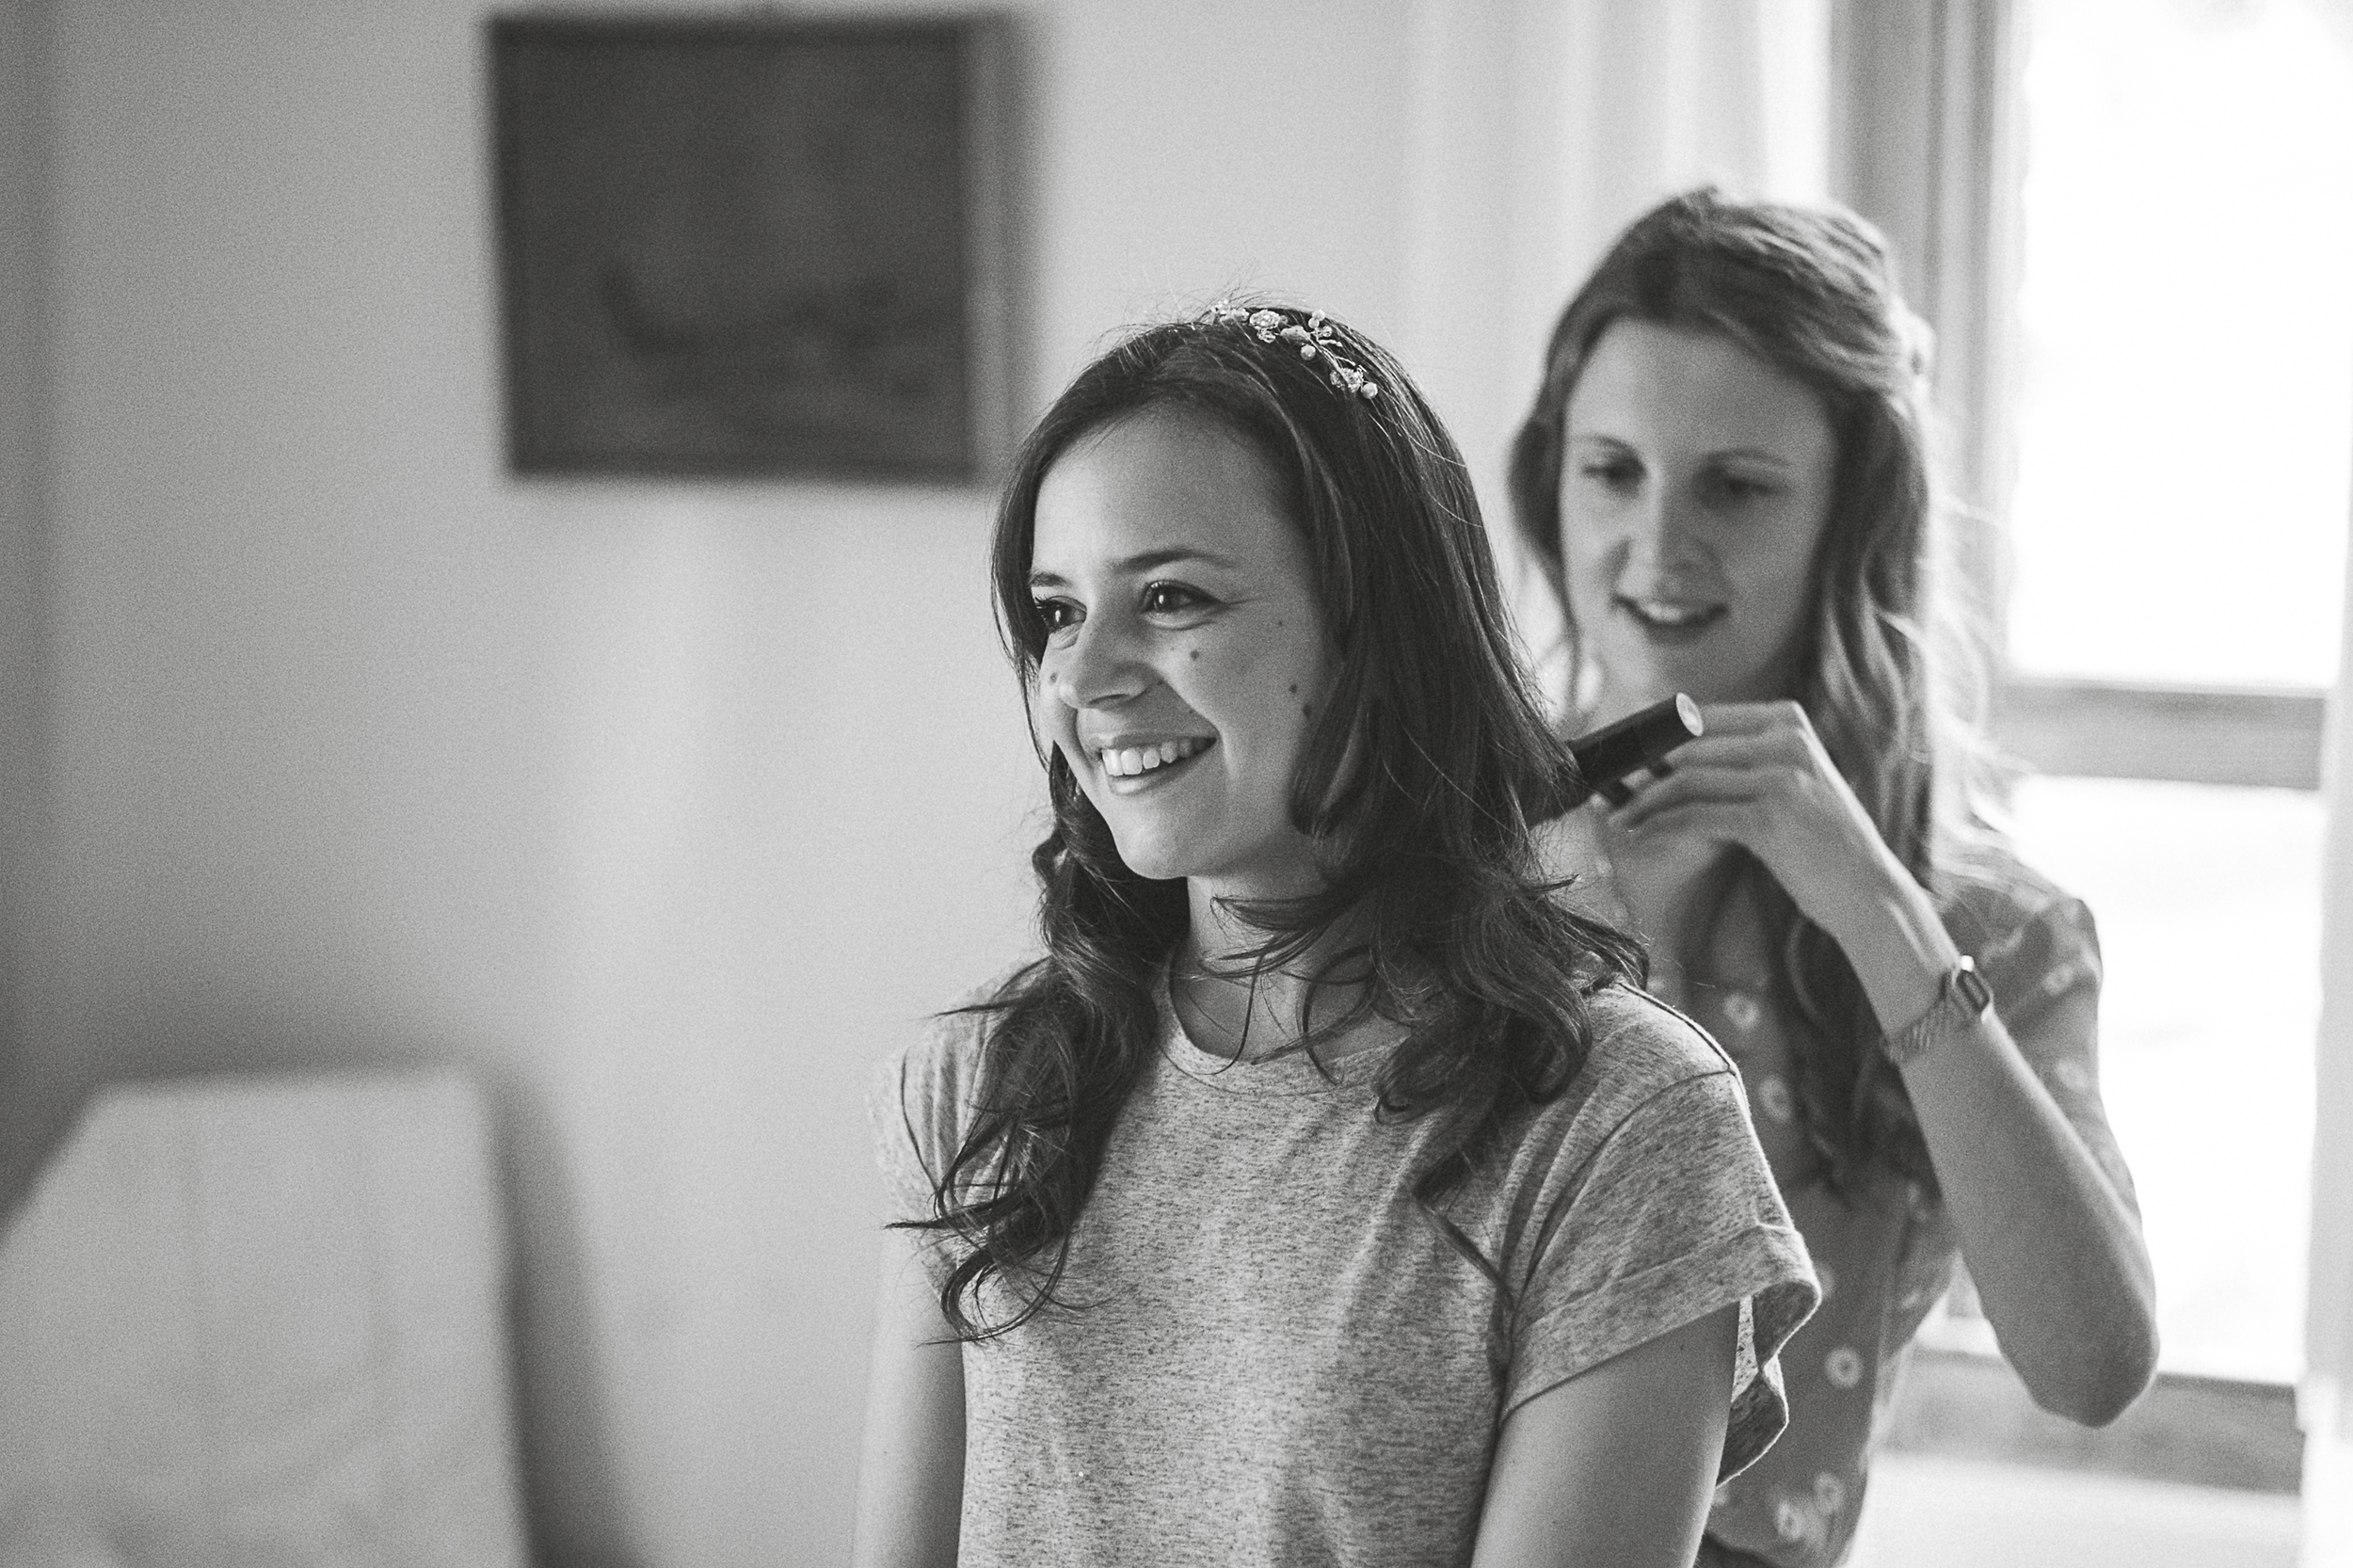
This post is going to go over how I go about editing my black and white shots in Lightroom and go over a few tips and tricks which I use when creating a black and white preset, for me I always use presets when editing a wedding to ensure consistency and speed of editing. First off here's a before and after:

RAW - Fuji XE-2 + 56mm

Black and White preset. Slightly underexposed.
I try and go for a nice tonal range with a slight clipping of the blacks, a little bit of grain and a little punch of contrast. The main and most important tool for creating this look is the tone curve.
Lightroom's Tone Curve
This tool is where black and white's can be brought to life, without using it in the preset my black and whites look something like this:
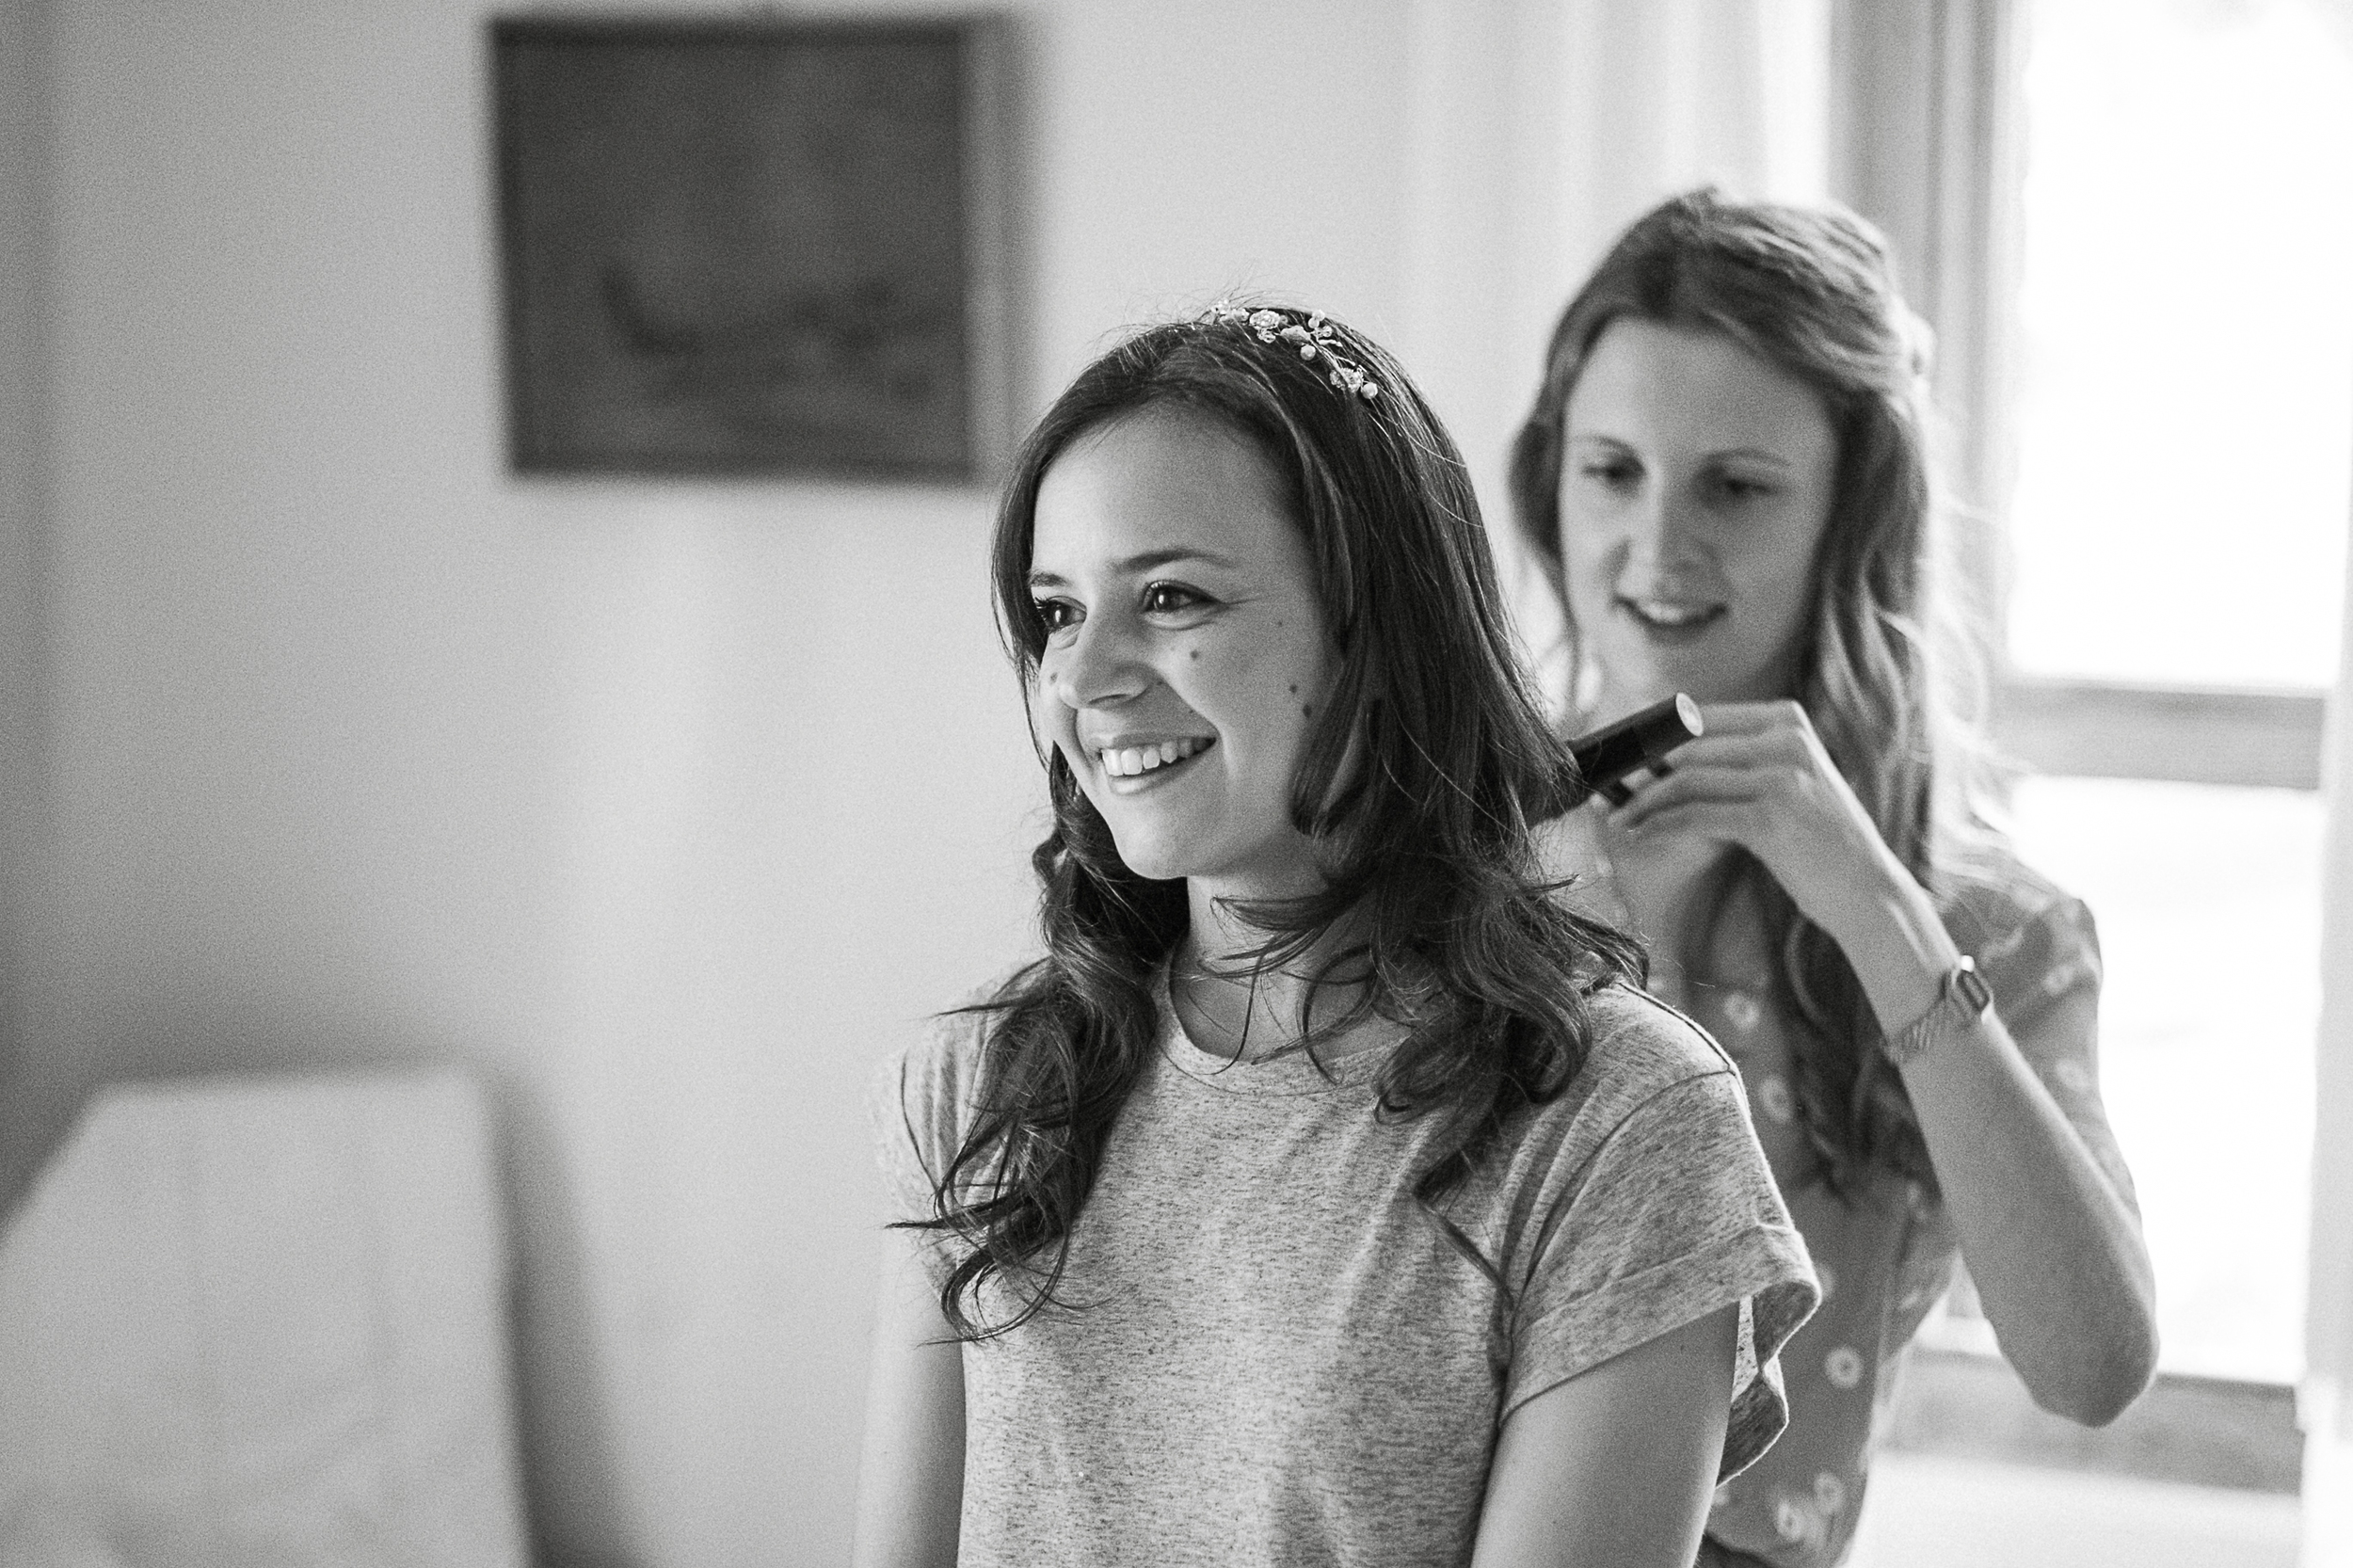
For sure there is nothing 'wrong' with this image and the tones are then and look rather nice, but with the curve applied it takes on a whole new feeling and one which I much rather refer the look of:

Notice how the image has a slight purple tint to it and the blacks are quite hitting the black point, all of this is controlled through the tone curve and below I'll detail what is happening.
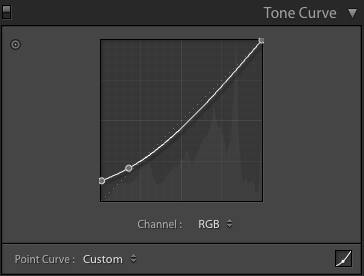
This is the RBG tone curve for this image and this first one mainly controls the black and white tones, it starts with a diagonal line across the middle which is the base point.
-To 'clip the blacks' (Make them more grey instead of black) move the bottom left point up the left hand side.
-By adding the second point and pulling down this keeps the clipped blacks while putting the contrast back in, therefore not having a washed out looking image.
This is the image with only the RGB curve applied.
Next up is a rather tricky process of tweaking the RGB curves independently to apply a slight colour to the image and expand the tonal range.
-Click the channel button to select each RGB curve separately.
-Aim to make a slight 'S' shape curve on each one.
-If the image looks too much of one colour bring it's curve back down past the centre line.


It takes a lot of fine tuning to get the desired look, as well as applying the settings to multiple images to ensure the preset looks good with the majority of your images.
The tone curve is the main setting to get this look, adding some large [but low amounts] of grain is my preferred feel for grain, and I feel it helps to bring the image together.
I hope you found that in some way useful, i by no means consider myself any kind of teacher so do drop me a question in the comments if I've missed a key element.]
Below are some before and afters, enjoy.
Cheers, Col-


